But you might find that your first font choice isn’t exactly what you were looking for, or that you have received an image from someone else and you want to use a different font. Fortunately you can change fonts in Photoshop CS5 using the type tool that was initially used to add that text layer.
How to Change Text Font in Adobe Photoshop CS5
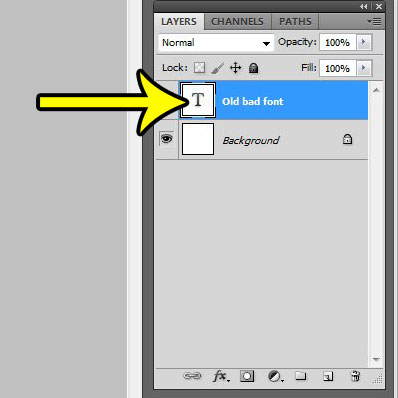
The steps in this guide are going to show you how to change the font for an existing text layer in an Adobe Photoshop .psd file. These steps will not work if there is text that has been rasterized already, or if you have a non-layered image (.jpg, .png, .gif, etc.) in which the text is included as part of the image. In that case you would need to erase the text from the image, then create a new text layer. Step 1: Open your Photoshop file. Step 2: Select the text layer from the Layers panel at the right side of the window. If you don’t see the Layers panel, press F7 on your keyboard to show it.
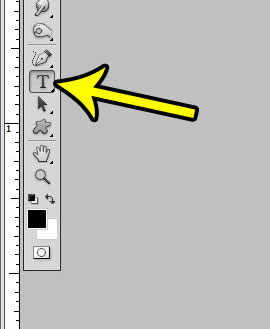
Step 2: Click the Horizontal Type tool in the toolbox.
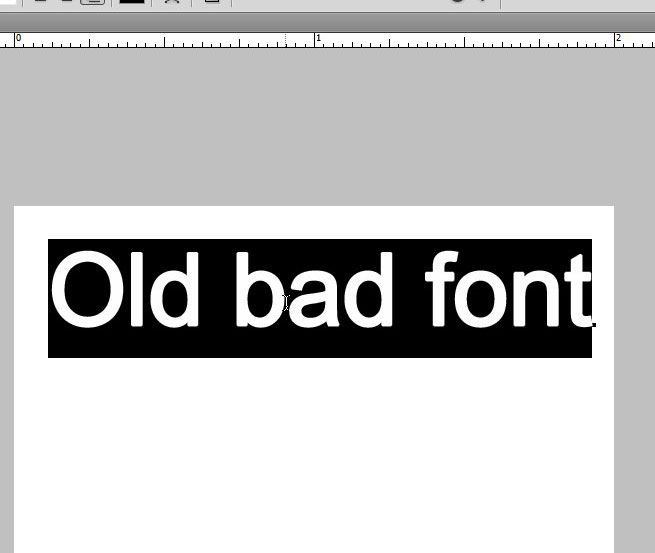
Step 3: Click inside the text layer, then press Ctrl + A (Command + A on a Mac) on your keyboard to select all of the text on the layer.
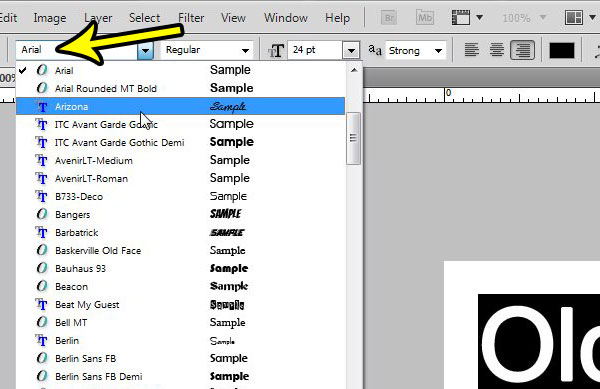
Step 4: Click the font dropdown menu at the top of the window, then select the new font that you would like to use. Note that you can also change the font size, color, alignment, and more using the options in the top toolbar.
Is there a font that you would like to use in your image, but you don’t know how to add it to photoshop? Learn how to add new fonts in Photoshop CS5 that you have downloaded from the Internet. He specializes in writing content about iPhones, Android devices, Microsoft Office, and many other popular applications and devices. Read his full bio here.