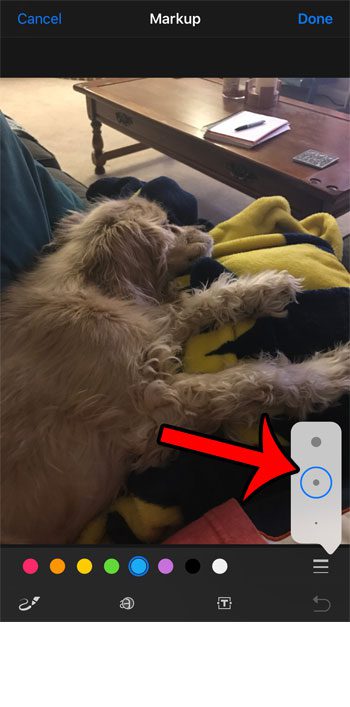
Our guide below will show you how to get to the markup tool in the iPhone Photos app so that you can start drawing on the pictures that you have saved to your device. Once done, that modified picture will be saved to your camera roll so that you can share it with your contacts like you would with a regular photo.
How to Use the Markup Tool to Draw or Write on a Picture in iOS 10
The steps below were performed on an iPhone 7 Plus, in iOS 10. This feature is available for other iPhone models using the iOS 10 operating system as well. Step 1: Open the Photos app.
Step 2: Select the album containing the picture on which you would like to draw.
Step 3: Select the picture.
Step 4: Tap the Adjustments icon at the bottom of the screen. It’s the icon that looks like three lines with circles on them.
Step 5: Tap the circle with the three dots inside of it at the bottom of the screen.
Step 6: Tap the Markup button.
Step 7: Select the ink color that you would like to use to draw on the picture, then tap the icon that looks like three horizontal lines.
Step 8: Select the brush stroke size that you would like to use to draw on the picture.
Step 9: Draw on the picture, then tap the Done button at the top-right corner of the screen.
Step 10: Tap the Done button at the bottom-right corner of the screen to save your changes.
Are your pictures taking up a lot of space on your iPhone, and you would like an easy way to back them up somewhere so that you can delete them? Learn how to upload pictures to Dropbox automatically for a simple and convenient solution to this problem. After receiving his Bachelor’s and Master’s degrees in Computer Science he spent several years working in IT management for small businesses. However, he now works full time writing content online and creating websites. His main writing topics include iPhones, Microsoft Office, Google Apps, Android, and Photoshop, but he has also written about many other tech topics as well. Read his full bio here.
You may opt out at any time. Read our Privacy Policy


