You may occasionally encounter situations where you would like to record audio that you are hearing around you. Whether it’s music, a speech that you need to give at work or school, or simply a weird noise that you are having trouble describing, the ability to record sound can be very useful. Your iPhone lets you record audio with the use of an app called Voice Memos. Our guide below will show you how the Voice Memos app on your iPhone works by walking you through the process of recording a voice memo, then saving it to your iPhone. That voice memo can then be played as needed, or you can share it with others.
How to Record Audio on an iPhone 7
Our article continues below with additional information on recording audio on an iPhone 7, including pictures of these steps. You may want to know how to scan QR code on iPhone if you often see those codes at stores and restaurants and want to know what to do with them.
How to Record Sound from Your iPhone 7 (Guide with Pictures)
The steps in this article were performed on an iPhone 7 Plus, in iOS 10.3.2. The result of completing these steps will be that you have recorded sound using the microphone on your iPhone. That recording can then be saved to your iPhone with the name that you choose. You can play back that voice memo at any time.
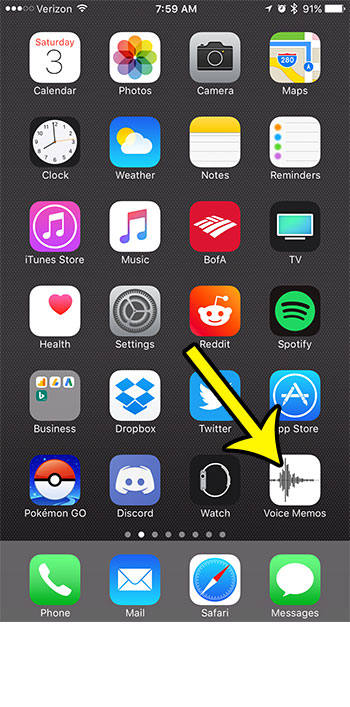
Step 1: Open the Voice Memos app.
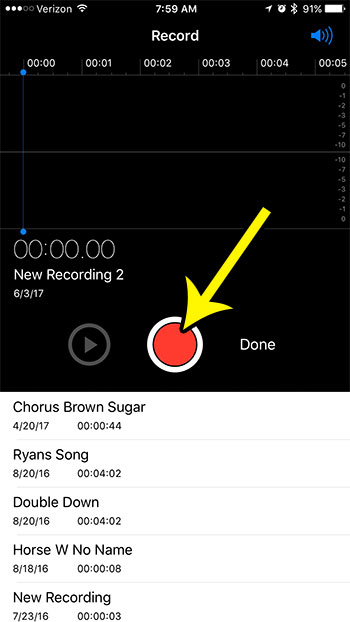
Step 2: Tap the red circle at the center of the screen to begin recording.
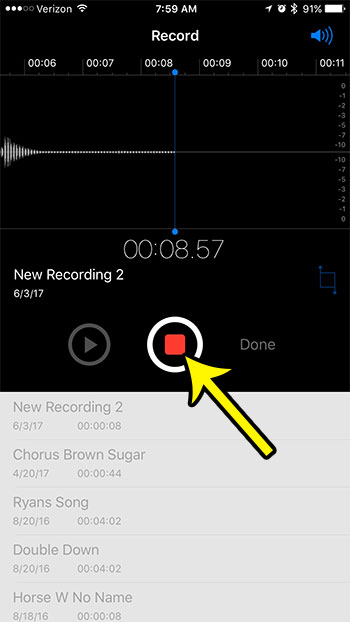
Step 3: Tap the red button again when you have finished recording.
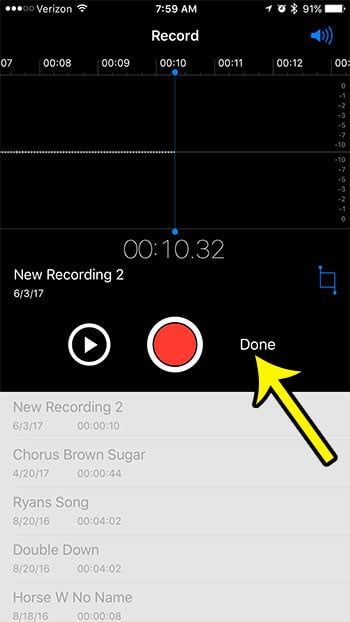
Step 4: Touch the Done button.
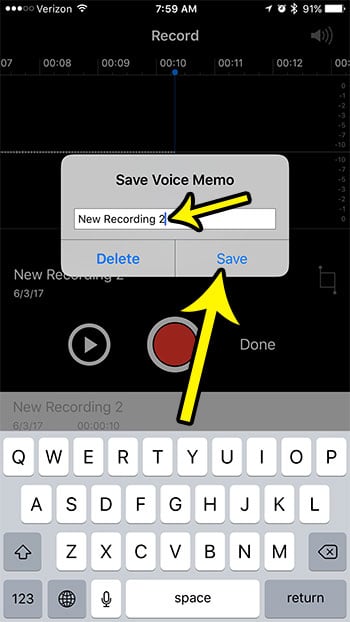
Step 5: Enter a name for the voice memo that you just recorded, then touch the Save button.
If you record a lot of voice memos, particularly lengthy voice memos, then you might find that you are running out of storage space. Learn about several ways to free up storage on your device if you need additional room for other apps, more vice memos, pictures, or songs.
He specializes in writing content about iPhones, Android devices, Microsoft Office, and many other popular applications and devices. Read his full bio here.
