But you may find that something has changed, and a color you used previously now needs to be removed. You can continue reading our how to remove color from Excel cells tutorial for more information about removing the background color from your cells.
How to Clear the Fill Color from an Excel Text Box
Our Excel tutorial continues below with additional information on how to remove fill color from a text box in Excel, including pictures of these steps. It’s a common design choice to apply a fill color to cells in an Excel spreadsheet when you are trying to use colors as a means of identification. While conditional formatting is a popular way to accomplish this in Excel, you may also elect to add fill color manually. Text boxes are helpful little document elements that can be beneficial when you need to add something to your document that isn’t working properly within the confines of the standard document layout. You can customize the text box without modifying the rest of your document, which offers some great options in terms of design. However, you might have a text box that contains a fill color which is being problematic. Fortunately, the text box fill color is something that you can change, or even choose to remove completely. Our guide below will show you where to find the text box fill color setting and remove the fill color from your selected text box entirely.
How to Remove Fill Color from a Text Box in Excel (Guide with Pictures)
The steps in this article were performed in the Excel 365 version of the Microsoft Office application, but will work in other versions of Excel as well.
Step 1: Open the Excel file with the text box to edit.
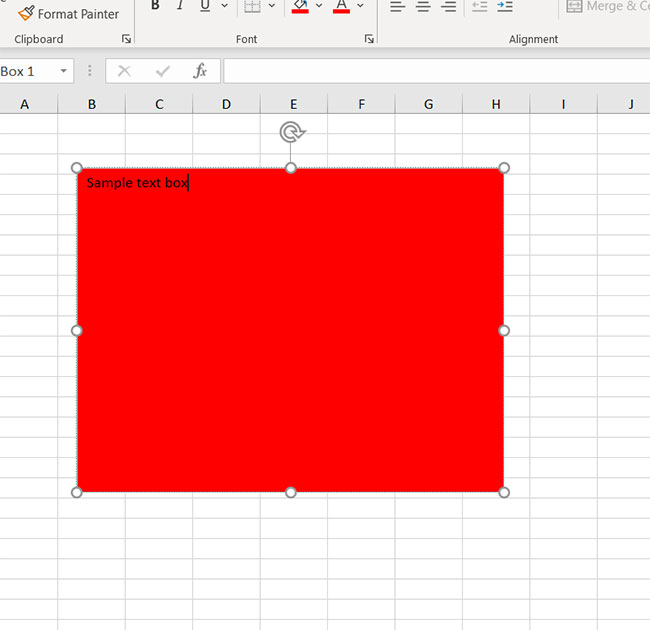
Step 2: Click on the text box.
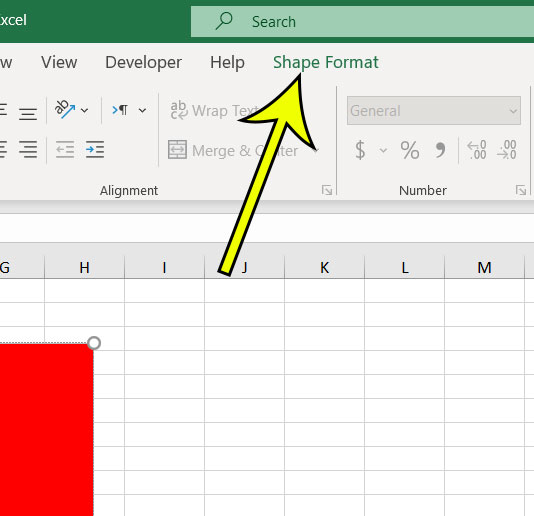
Step 3: Choose the Shape Format tab or the Drawing Tools Format tab.
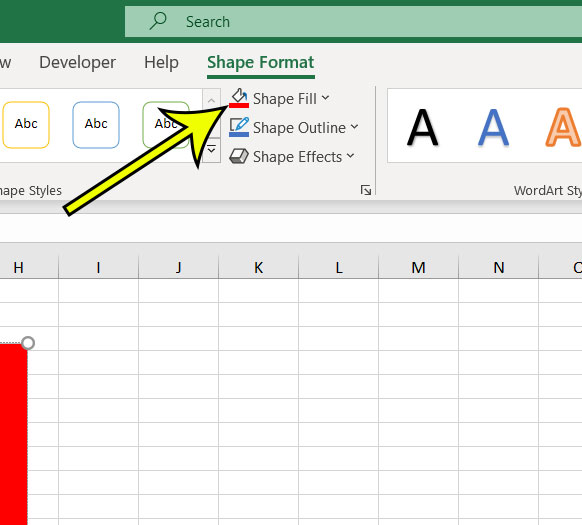
Step 4: Select the Shape Fill option in the Shape Styles group in the ribbon.
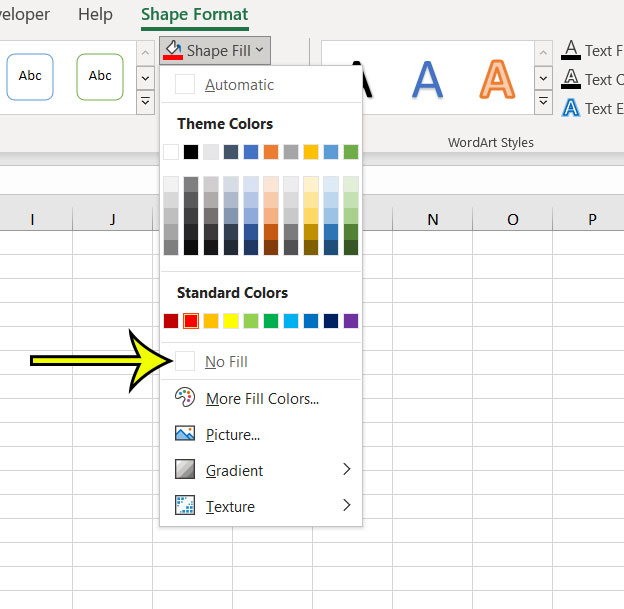
Step 5: Click the No Fill option from the drop-down menu.
If you have a fill color in a text box in your Microsoft Word document that you would like to remove as well, then you can follow the steps in the section below to remove it.
How to Clear the Fill Color from a Text Box in Word 2013 (Guide with Pictures)
The steps in this article assume that you have a text box in your Word document, and that the text box has a fill color that you don’t want. We will be focusing specifically on removing a fill color in Word 2013, but you will have the option of changing to a different fill color if you prefer. Additionally, note that there is a difference between “No Fill” and a white fill.
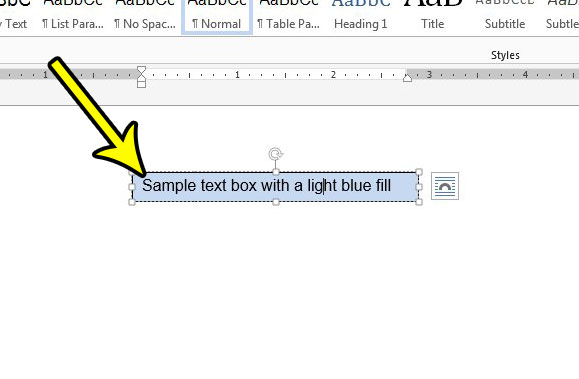
Step 1: Open your document in Word 2013.
Step 2: Click inside the text box containing the fill color that you want to remove.
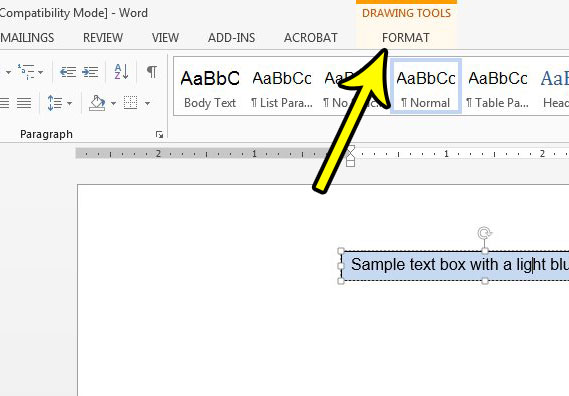
Step 3: Click the Format tab at the top of the window, under Drawing Tools.
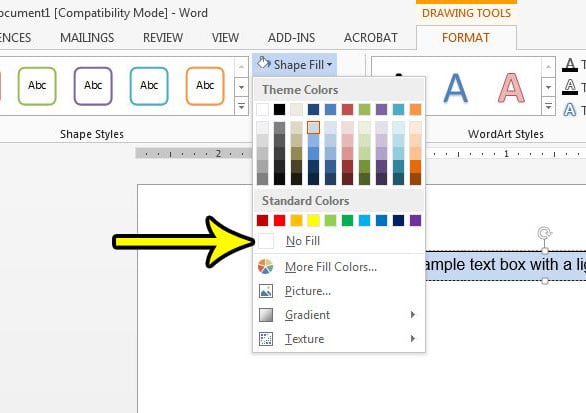
Step 4: Click the Shape Fill button in the Shape Styles section of the ribbon, then select the No Fill option.
Note that selecting the No Fill option gives you a text box with a transparent background. If you don’t want your background to be transparent, then select the white color on the menu in step 4 rather than selecting the No Fill option.
How to Open the Format Cells Dialog Box and Use the Fill Tab
One other way that you can remove cell fill color is by changing the cell shading option that is located on another menu that you can access through your Excel workbook. First, make sure that you have selected cells that contain fill color that you wish to remove. You could select the entire sheet with the Ctrl + A keyboard shortcut. Or you could select the entire worksheet by clicking the small gray button above the row 1 heading and to the left of the column A heading. Next, select the Home tab at the top of the window, then click the small Font dialog launcher at the bottom right of the Font group in the ribbon. You can then click the Fill tab at the top of the window and choose the No color option, or pick the desired color that you wish to use as the fill color for these cells. You could also click the More Colors button to choose a specific fill color that isn’t available on the color picker, or you could use a pattern color by choosing the Pattern Color drop down.
More Information on How to Remove Fill Color in Excel Text Boxes
The steps in this article discuss removing the fill color that has been added to a text box in a Microsoft Excel spreadsheet. But if you have fill color that is in a regular cell, or group of cells in your spreadsheet, then you can do that, too. To remove fill color from cells in Excel you can first select the cells, then click the Home tab, then click the down arrow next to the Fill Color button in the Font group on the ribbon, then choose the No Fill option. You could also elect to use a white fill color, but that can cause issues if you need to display gridlines or if you have other display needs that are affected by cell fill colors. You can use a similar technique to remove other formatting that has been applied to a selection of cells, such as a font color or font style. You can remove conditional formatting from a selection of cells by clicking the Home tab, then clicking the Conditional Formatting button in the Styles group of the ribbon. You can then select the Clear Rules option and click either Clear Rules from Selected Cells or Clear Rules from Entire Sheet. Do you need to add a background image or a watermark to your Word document and can’t figure out how? Learn how to use a background picture in Word 2013 if your current document has a need for one.
He specializes in writing content about iPhones, Android devices, Microsoft Office, and many other popular applications and devices. Read his full bio here.
