While you have long been able to take screenshots using a combination of button presses, this is a way for you to create an entire video that will capture everything that you are seeing or doing on your screen. Many iPad users have been waiting for this feature for a while, as it provides a lot of usefulness. However, if you are attempting to use the iPad’s screen recording feature, you might be wondering how you can add it to the Control Center so that it can be started.
How to Enable Screen Recording on a 6th Generation iPad
Our article continues below with additional information on how to screen record on iPad 6th gen, including pictures of these steps. Find out how to get sound on screen recording videos if the ones that you are making are silent.
How to Record Your iPad Screen (Guide with Pictures)
The steps in this article were performed on a 6th generation iPad using the 13.5.1 version of the iPad operating system.
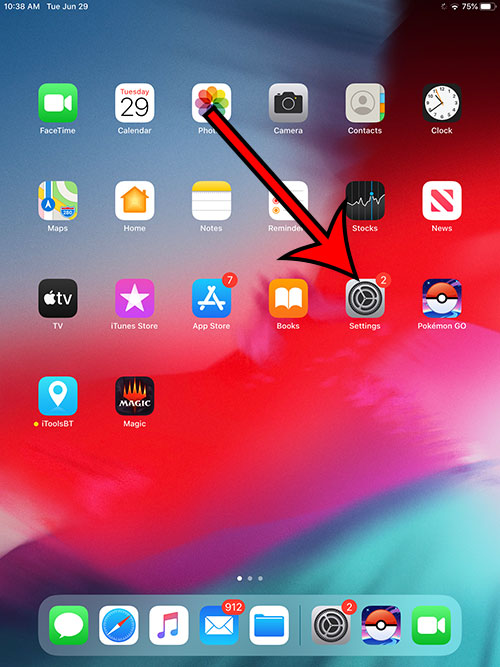
Step 1: Tap the Settings icon.
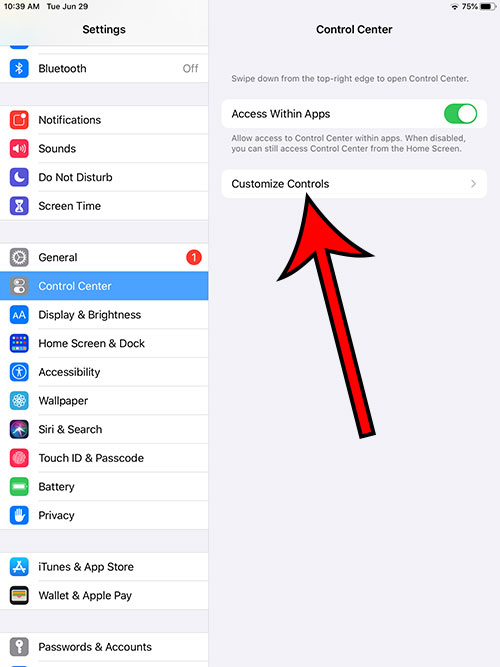
Step 2: Choose the Control Center option from the column on the left side of the screen.
Step 3: Select the Customize Controls button in the column on the right side of the screen.
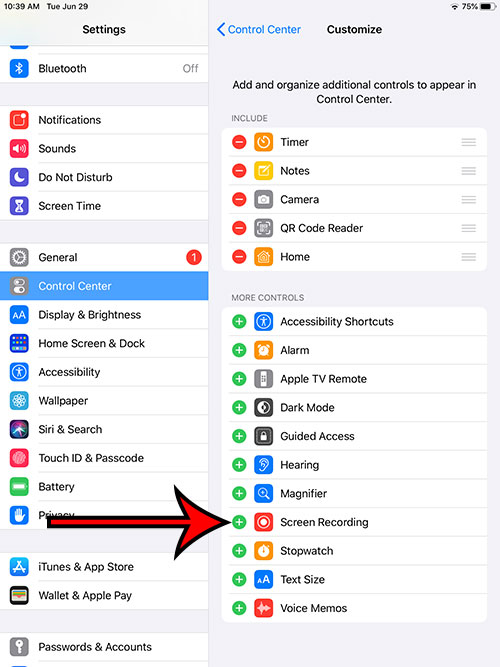
Step 4: Tap the small green plus symbol to the left of Screen Recording.
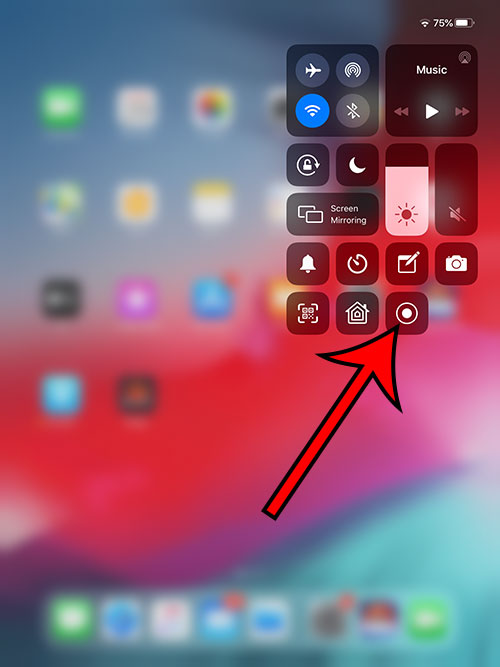
When the Screen Recording option is listed under the “Include” section at the top of the menu, then you have successfully added it to the Control Center. Now you can simply swipe down from the top right corner of the screen to open the Control Center, then tap the Screen Recording button to begin. Now that you know how to screen record on iPad 6th gen you might be looking for answers to some other related questions.
More Information on How to Enable Screen Recording on a 6th Generation iPad
As you press the Screen Recording button in the Control Center to begin a recording, there will be a three second countdown. You will know that the screen recording is occurring when you see a red rectangle with a white circle inside of it at the top right of the screen. To end the screen recording you will need to open the Control Center again and press the Screen Recording button to end it. The screen recording will not include sound by default. If you would like to enable the microphone you will need to tap and hold on the Screen Recording button in the Control Center, then tap the Microphone button to turn it on. Once you have ended a screen recording it will be saved to your Photos app. Screen recordings are comparable in size to videos that you record with the Camera app, so they can be quite large as the videos get longer.
Additional Sources
After receiving his Bachelor’s and Master’s degrees in Computer Science he spent several years working in IT management for small businesses. However, he now works full time writing content online and creating websites. His main writing topics include iPhones, Microsoft Office, Google Apps, Android, and Photoshop, but he has also written about many other tech topics as well. Read his full bio here.
You may opt out at any time. Read our Privacy Policy