Part 1 – Getting a domain namePart 2 – Setting up a hosting account (this article)Part 3 – Changing name serversPart 4 – Installing WordPress
Once you have a domain name for your website (if you don’t have a domain yet, check out our article on buying a domain from Hostgator), you need a hosting account where you can put all of the information that you want people to see when they visit your domain. There are many options available to you when it comes to choosing a Web hosting provider, but one that I have used for many years is Hostgator. They have reliable uptimes, sites on their hosting platform are fast and responsive, and you have a lot of control over the way that your website operates. It’s also very beginner-friendly, so you won’t need to be nervous if this is the first time you have set up a website. In our previous article on buying a domain name, we registered a domain with Hostgator called answeryourtech.com. In the steps below we are going to be signing up for a hosting account with Hostgator where that domain name will be hosted.
Click here to go to Hostgator’s Web hosting signup page
How to Create a Web Hosting Account with Hostgator
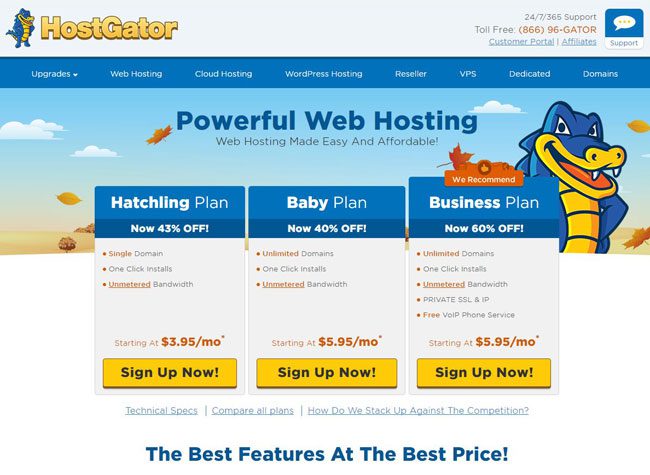
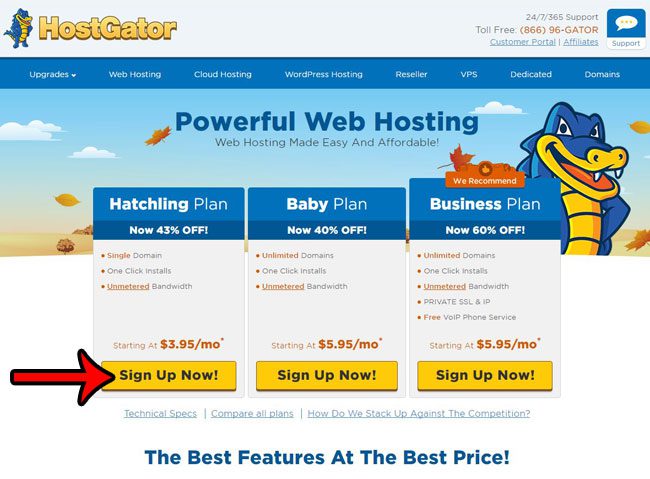
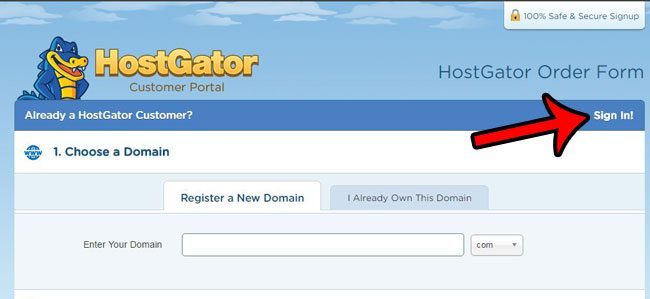
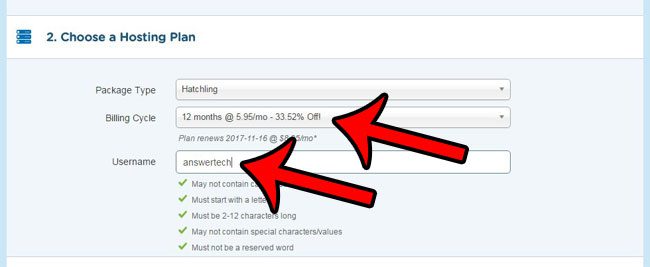
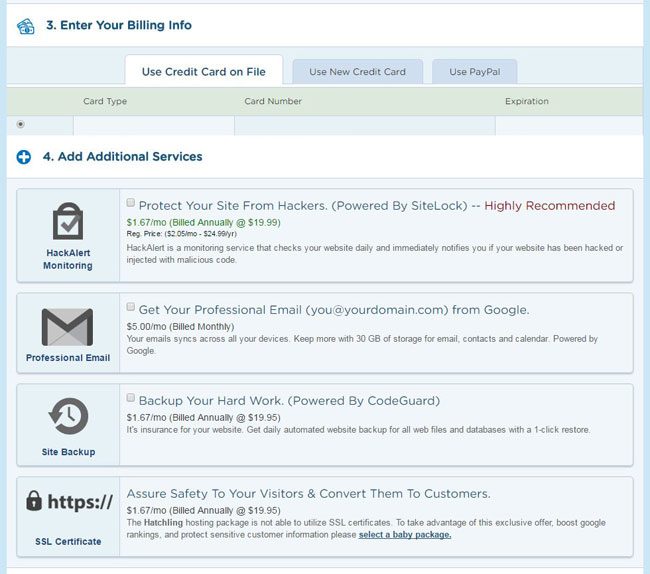
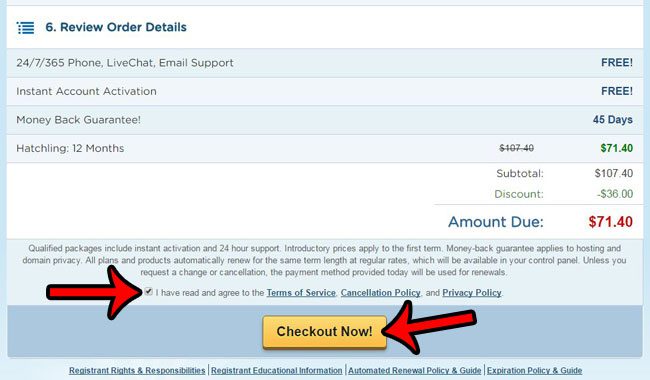
Step 1: If you haven’t done so already by clicking the link above, head over to Hostgator’s Web hosting signup page. Step 2: Select the plan that you would like to purchase. The Hatchling plan is the cheapest option, but you will need to select the Baby or Business plan if you plan to host more than one website. Step 3: If you already bought a domain in our last article, then click the Sign In button at the top-right corner of the screen to sign into your existing Hostgator account, then click the I Already Own This Domain option and enter the domain that you registered. Otherwise, you can click the Register a New Domain or I Already Own This Domain tab to create a hosting account for a domain with a different registrar. Step 4: Click the Billing Cycle drop-down menu to select the term length for your hosting account, then enter a username for the hosting account. I typically like to go with 1 year, but you can choose a month-to-month option if you aren’t sure that you want a website, or you can click one of the longer term lengths if you know that you will have the site for a while. Note that with the 1 year, 2 year, or 3 year terms that you are going to be paying the entire amount upfront, but the average monthly cost will be lower. Step 5: Use the credit card information that is saved to your file if you already have a Hostgator account, or click the User New Credit Card or Use Paypal options. Additionally, make sure to uncheck any of the options under Additional Services that you don’t want. Step 6: Scroll down and confirm that everything in the order details is correct, check the box to the left of I have read and agree to the terms of service, then click the Checkout Now button. We’re almost there! Now you have a domain name and a hosting account. The only thing that is left is setting up the site. We are going to be setting up WordPress on out Hostgator Web hosting account. This next part is free, and is only going to take a few minutes. You can click here to read our article on changing the name servers for your Hostgator domain to point at your hosting account. Some of the links in this article are affiliate links. This means that, should you choose to make a purchase from Hostgator, we will receive a commission for that purchase. After receiving his Bachelor’s and Master’s degrees in Computer Science he spent several years working in IT management for small businesses. However, he now works full time writing content online and creating websites. His main writing topics include iPhones, Microsoft Office, Google Apps, Android, and Photoshop, but he has also written about many other tech topics as well. Read his full bio here.
You may opt out at any time. Read our Privacy Policy
