How to Change Column Width in Excel 2013
Our guide continues below with additional information to answer the question of what are three ways to change column width in Excel, including pictures of these steps. The heights of rows and widths of columns in an Excel spreadsheet are the same size in every new spreadsheet that you create. But the data that you put into your cells can vary in size, and you may find that the default cell sizes are often too small or too large. Fortunately, the sizes of your cells are elements that can be adjusted, and modifying your column widths is a simple task that will make your spreadsheet easier to read and work with. So continue reading below to learn about several different methods that you can use to change the widths of your columns in Excel. Did you know that there is also a method for how to expand rows in Excel? This can be useful when you have multiple lines of data inside of your cells and want it all to be visible.
How to Adjust Column Width in Excel 2013 (Guide with Pictures)
This article was written using Excel 2013, but the same steps can be applied in other versions of Excel as well. Additionally, you can follow similar steps if you need to adjust the height of your rows. There are three different ways to adjust column widths that are discussed below. Choose the best option based on your spreadsheet needs.
Method 1 – Manually Resize Column Width
This option is best used if you wish to visually modify the width of your columns. Step 1: Open your spreadsheet in Excel 2013.
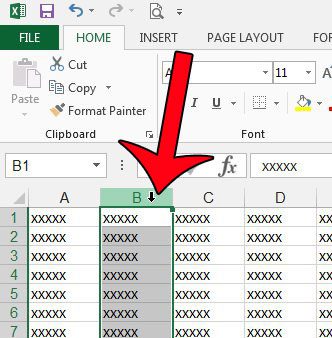
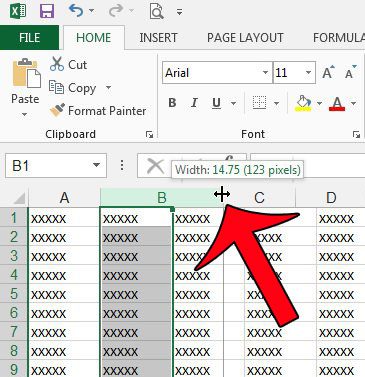
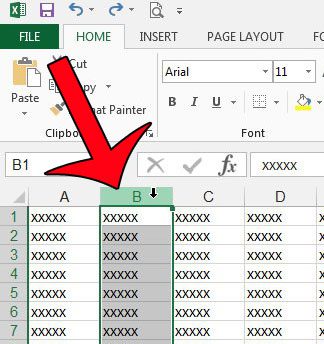
Step 2: Locate the column whose width you wish to adjust. Step 3: Click the right border of the column letter, then drag it left or right to the desired width.
Method 2 – Numerically Resize Column Width
This option is best used if you want to make sure that all of your column widths are the same size. You can also use this option with multiple selected columns. Step 1: Open your spreadsheet in Excel 2013.
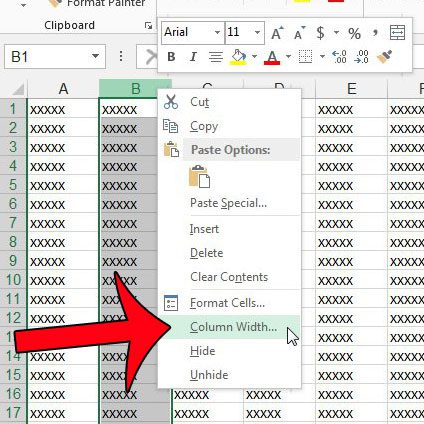
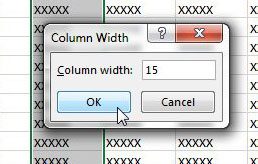
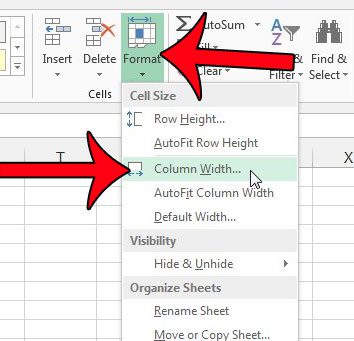
Step 2: Right-click the column letter that you want to change, then click the Column Width option. Step 3: Enter a new value inside the Column Width field, then click the OK button. If you are not able to use right-click, then you can find the Column Width option by clicking the Home tab at the top of the window, clicking the Format button in the Cells section of the navigational ribbon, then clicking the Column Width option.
Method 3 – Resizing the Column Width Based on the Width of the Cell Contents
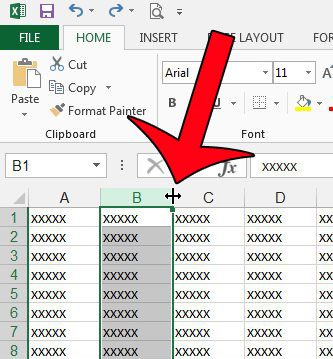
This option is best used when you simply want all of the data contained within a column to be visible. Step 1: Open your spreadsheet in Excel 2013. Step 2: Click the column letter of the column whose width you want to adjust automatically. Step 3: Position your mouse cursor on the right border of the column, then double-click your mouse. The column will automatically adjust itself to fit the size of the data contained within it. This can make your column widths smaller or larger, depending upon your data. Are there multiple columns in your spreadsheet that you would like to resize to fit their contents? Learn how to autofit column widths in Excel with just a few button clicks.
Additional Sources
After receiving his Bachelor’s and Master’s degrees in Computer Science he spent several years working in IT management for small businesses. However, he now works full time writing content online and creating websites. His main writing topics include iPhones, Microsoft Office, Google Apps, Android, and Photoshop, but he has also written about many other tech topics as well. Read his full bio here.