You might be looking for a Windows 7 video editor if you have a video file that you need to modify. Whether you have an iPhone video that you need to rotate, or you want to speed up a video clip that might move a little too slowly, the ability to edit a video file is something that can come in handy. There are many Windows 7 video editing tools available for your computer, but the barrier for entry may be too high for individuals that do not want to spend a lot of money on software that they will use sparingly. Additionally, many of these tools are not very user-friendly, and require a considerable amount of education before you can perform very simple tasks. Fortunately Microsoft has made the Windows Live Movie Maker available to anyone that has a valid Windows 7 product key. This video editing tool is available as a free download, and is part of Windows Live Essentials. With this program you can perform many video editing functions, plus you can save in a variety of formats, or upload your finished video directly to your favorite video sharing site.
How to Edit Videos on Windows 7
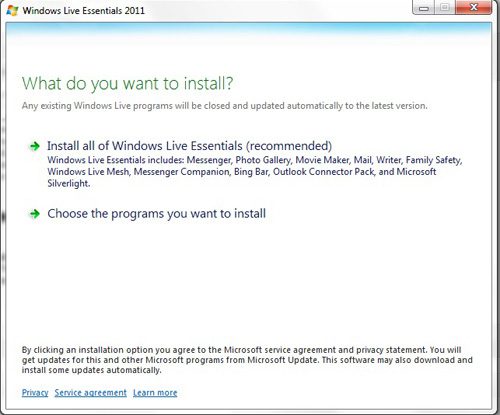
You can download Windows Live Movie Maker from this link at Microsoft.com. Simply select your language and click the Download button, then save the file to your computer. Double-click the downloaded file once it has finished downloading, then click the Choose the programs you want to install link on the screen shown below.
Note that you can also elect to Install all of Windows Live Essentials but, for the purposes of this tutorial, only Windows Live Movie Maker is required. Click Windows Live Movie Maker, then click the Install button. Once the installation has finished, you are ready to begin using your new Windows 7 video editing tool.
How to use the Windows 7 Video Editor
Due to the complexities and surprising amount of tools available in this free video editing program, it would be difficult to discuss every editing option that is included. Therefore, we are just going to focus on getting started, familiarizing ourselves with the program, and saving the edited video.
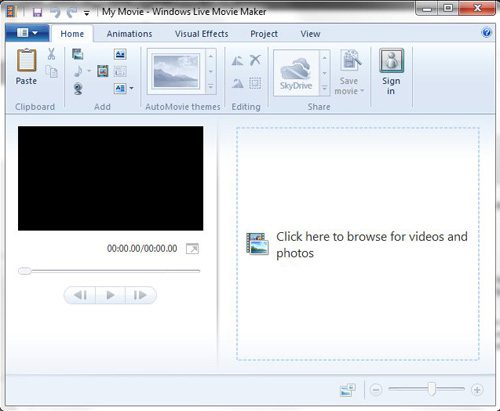
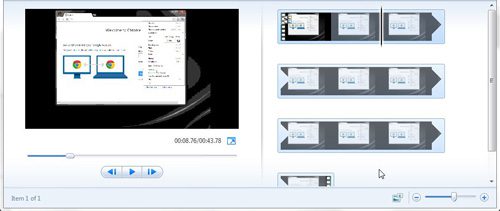
At the top of the window you will notice a sequence of tabs labeled Home, Animations, Visual Effects, Project, View and Edit. Windows Live Movie Maker employs the same ribbon-based navigation structure as the Microsoft Office programs, so clicking each of these tabs will display a different set of tools related to the tab title. For example, clicking Visual Effects will offer a menu of different effects that you can click to apply to your video, while clicking Animations will allow you to add one of many transition effects at the beginning or end of your selected video segment. The main portion of the screen is divided into two sections. The section on the left side of the window contains a preview window where you can view, play, rewind and fast forward your video. The section at the right side of the window is the timeline, where you can see the entirety of your video. You can click at any point on the timeline to move the video to that point, at which time you can use the controls in the preview window to play, rewind or fast forward the video.
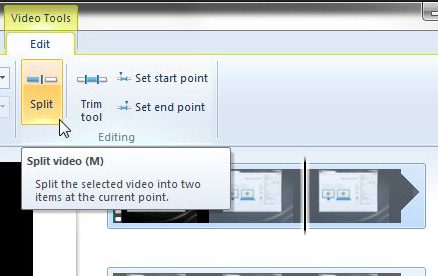
Some of the more basic functions that you will want to learn how to use are the Title tool on the Home tab, which allows you to insert a black screen in your video on which you can type text. You can also use the Title tool to add a blank screen for text into the middle of your video, but you will first need to split the video at the point where you want to insert the title screen. You can accomplish this by using the Split tool on the Edit tab. Using the Split tool requires you to click on the timeline section of the window to select the point in the video where you want to insert the title, then you click the Split button in the ribbon at the top of the window.
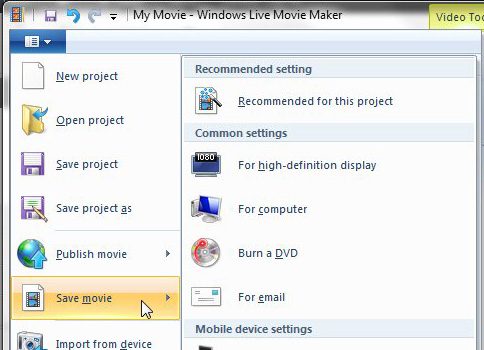
If you want to delete a segment from your video, you can split your video at the beginning of the segment and at the end of the segment, that right click on the unwanted segment and click Remove. When you are done editing your video, click the Movie Maker tab at the top-left corner of the window, then click Publish Movie to upload the video to the Web, or click Save Movie to create a copy of the video on your computer.
There are a number of different formats in which you can save your movie, so consider where you want to view the video, then choose the appropriate format. it is also worth noting that the videos you create in this manner can also be uploaded to most video sharing sites as well. After receiving his Bachelor’s and Master’s degrees in Computer Science he spent several years working in IT management for small businesses. However, he now works full time writing content online and creating websites. His main writing topics include iPhones, Microsoft Office, Google Apps, Android, and Photoshop, but he has also written about many other tech topics as well. Read his full bio here.
You may opt out at any time. Read our Privacy Policy